The Arduino was one of my first “modern” introduction into the world of open-source electronics. The original use case for my DIY IGUS Time Lapse slider, then got used in the Quantum Double Slit Experiment to build a true Random Number Generator, and was also a part of my SAP DemoJam session. It always seems to be a great “go to” tool for interfacing with physical sensors, wiring something simple up or testing out different electronics.
I don’t use Cameo cutter much at all, so I was pretty disappointed to see it not working correctly when I wanted to cut some vinyl stickers for my bike project. The carriage would just slowly move to the right and stop. Turn it off and back on, and it would do the same until it hit the right side and make a terrible knocking noise as the position sensor did know where the carriage was.
Disassembling the unit and doing some online searching it seems the left stop sensor was bad. It is a Normally Open IR switch and after doing some extensive searching was able to find a replacement online. I mocked up the circuit board and cut a prototype on the Glowforge, did some very small soldering to wire it up, and it 100% fixed the problem.read more
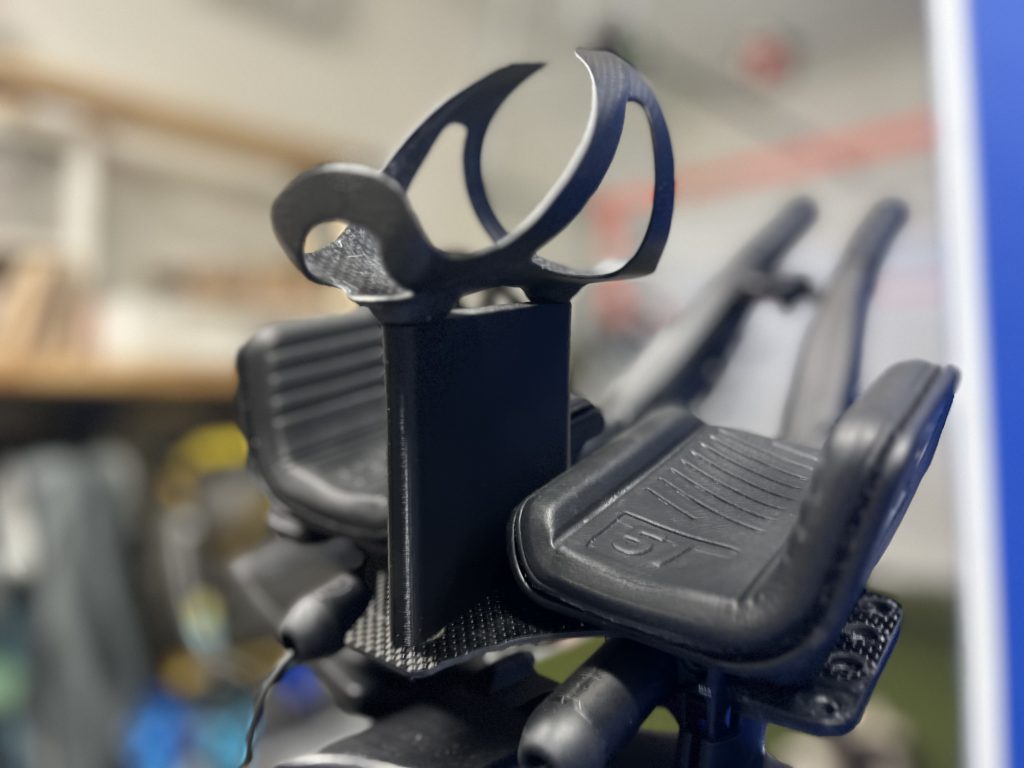
Another 3D printed bottle holder for my Canyon Speedmax. This is a raised bottle holder for between your arms and mounts a traditional water bottle cage.
The typical distance between for the mount holes on cages are 64mm. 2 100mm M5 bolts keep the mount attached to a custom made carbon fiber base plate.
After reading about some aero gains from Crank covers, I decided to try and 3D print one to fit on my SRAM Rival crankset on my TT bike. The curves and irregular shape/profile of the crank made it difficult to model, so I printed a flat surface, and used heat to mold it to match the profile. It is held on via zip ties.
The design was done using Fusion 360 and a front and and side profile reference image. I printed this on a Prusa MKII.
This was one of my first prototypes. Due to the low melting point of PLA, a heat gun pretty quickly warms it sufficiently to get it to mold into the correct shape.
This was the final version.
EZGains testing results regarding covers and their benefit:read more
I have always enjoyed the concept of being immersed into a virtual world. One of my first experiences with VR was in roughly 1993 when our local arcade introduced a game from one of the OG gaming founders John Waldron called Dactyl Nightmare on a 1000CS. After that experience, I have always wanted to build a motion sim which gets you as close to reality as possible.
Last year I took the first steps and decided to put the initial blocks in place and start with sim platform that I could eventually add motion to. I purchased a Fanatic wheel base and thought it would be a great learning experience to build the steering wheel from scratch. Many of the components can be built versus bought which is what is keeping me motivated to eventually get the entire system together.read more
Designing, building and then using something you have made, has been one of the most rewarding and personally satisfying activities I have found in my life so far. I was born a tinkerer, always disassembling, trying to understand and improve or recreate.
My favorite TV show is “How it’s made”.
I have way too many expensive tools, printers, cutters and machines, and not a single one has made a significant return on the investment … but, what I have learned using them has been 10x …
Its not just the tool, its the tools to use the tool, the software to design the product, the process to start, run or finish the machine or product, the prep work, consideration and the functionality.read more
This weekends challenge, a better hook for a bicycle:
Want to laser cut one of your own or remix it? Check it out on Thingiverse
This is a vertical based bike hook for bicycles with aero (deep) front rims. Currently there are not many wheel hooks that keep the front wheel vertical and that don’t scratch the rim when putting the bike up.
The hook is lasercut using a glowforge and medium draft board (the material thickness is important as all the slots need to interlock). Assembly is slotting the parts together and installation requires two screws/anchors into the wall.
It was specifically designed for a Reynolds AR80, however, I believe other wheels with similar dimensions, depths or profiles should fit.read more
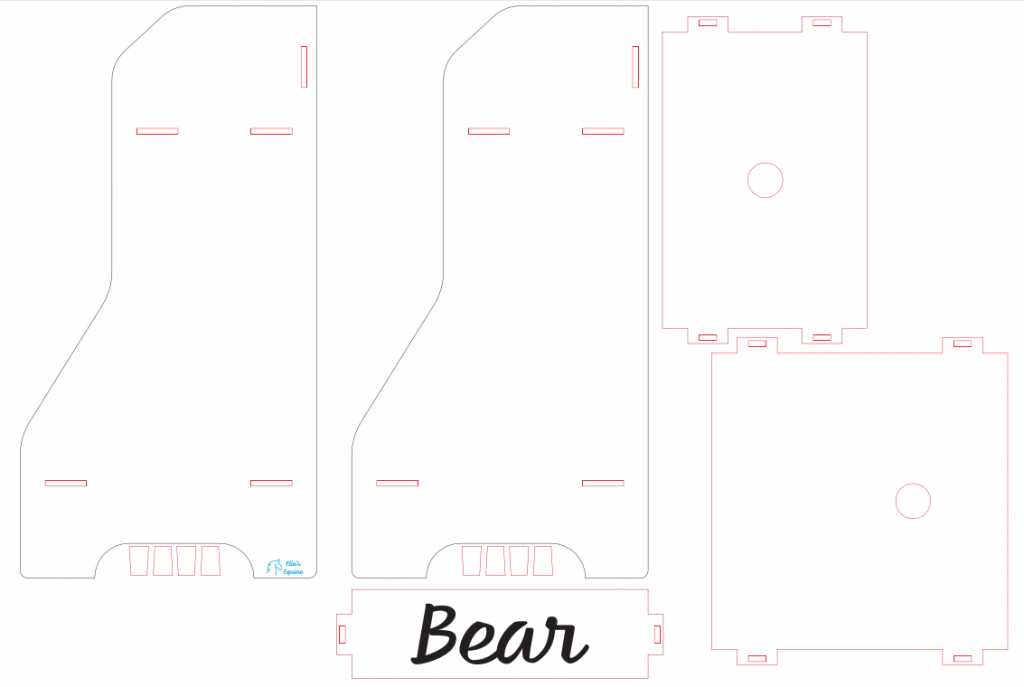
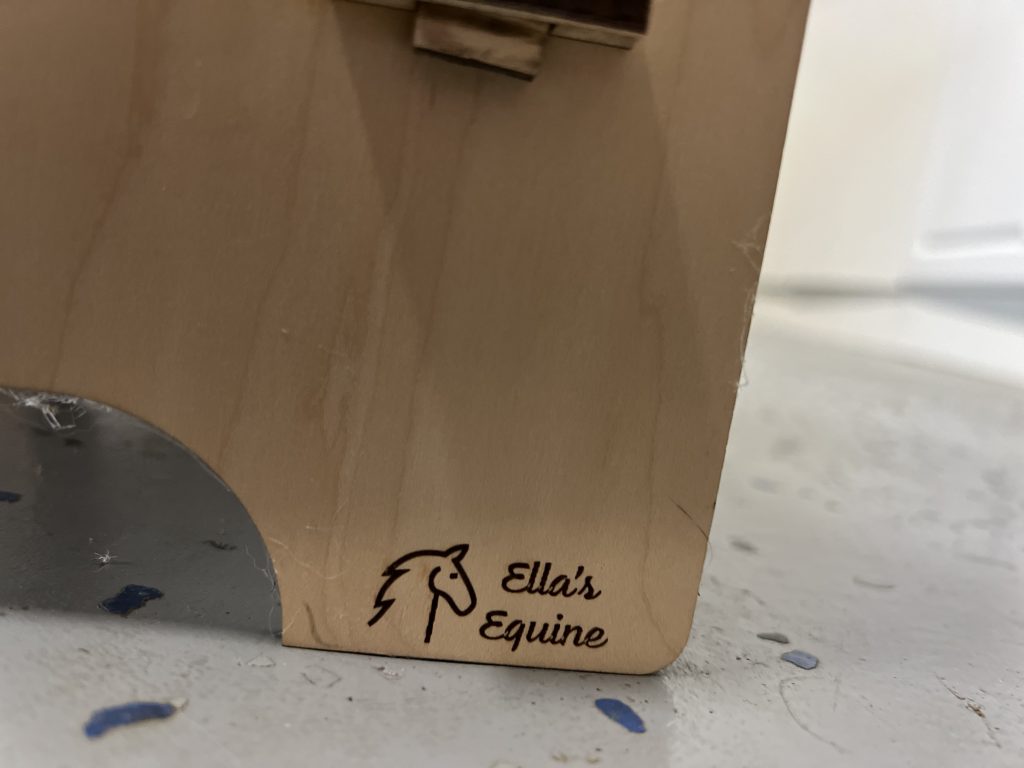
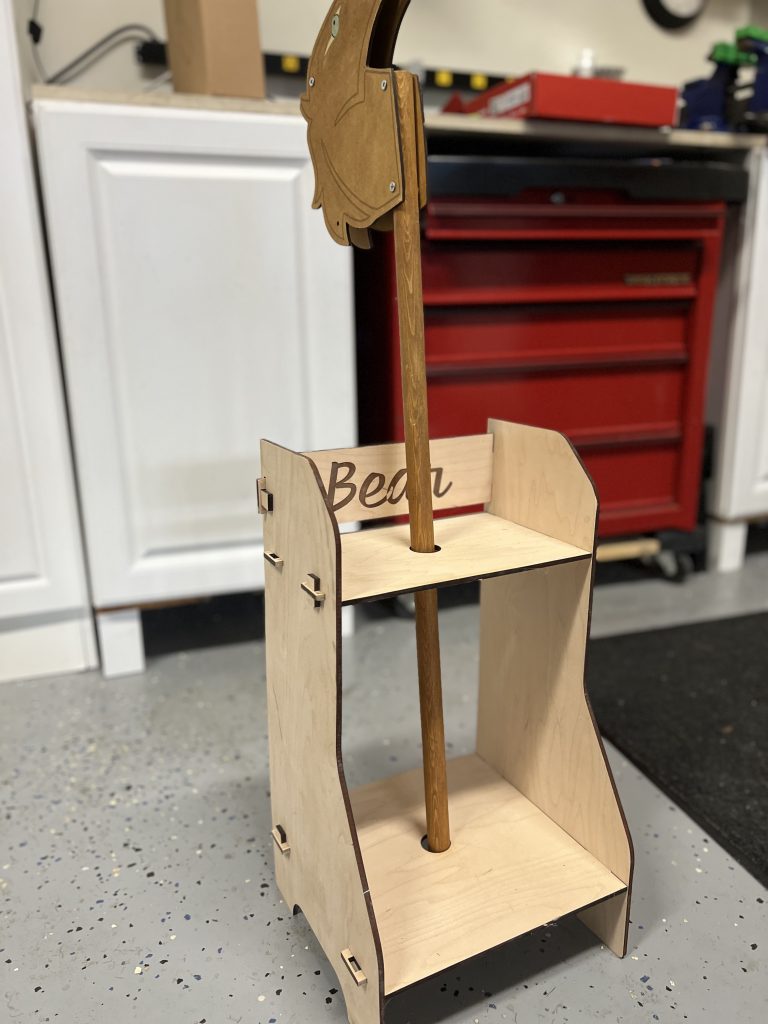
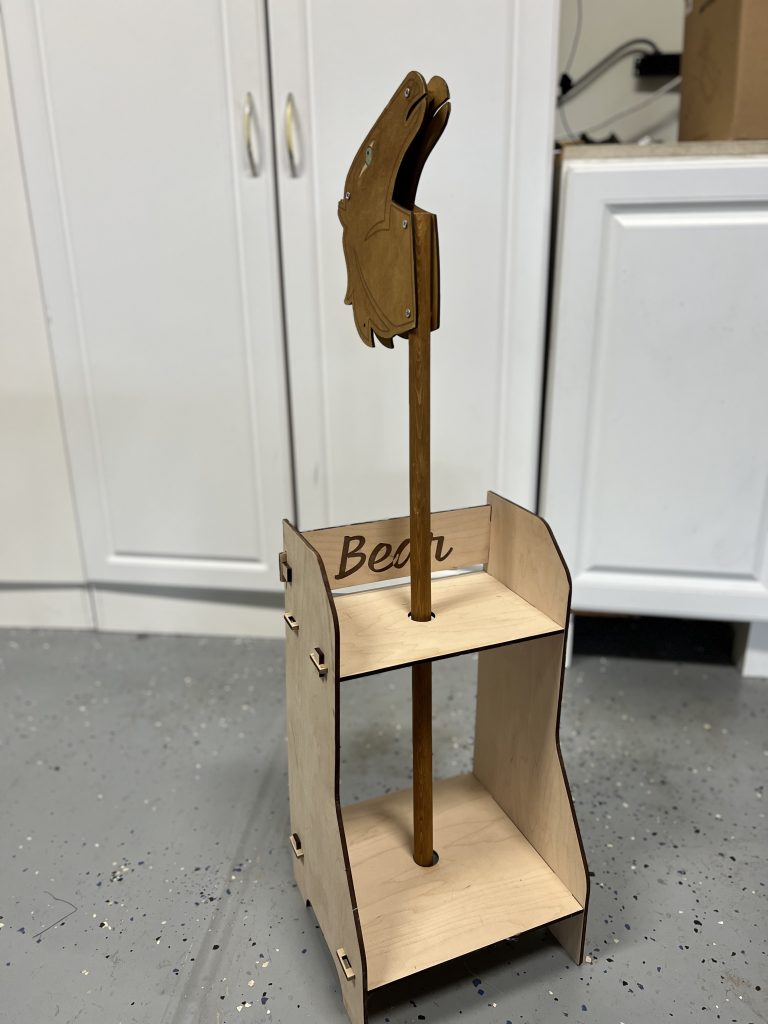
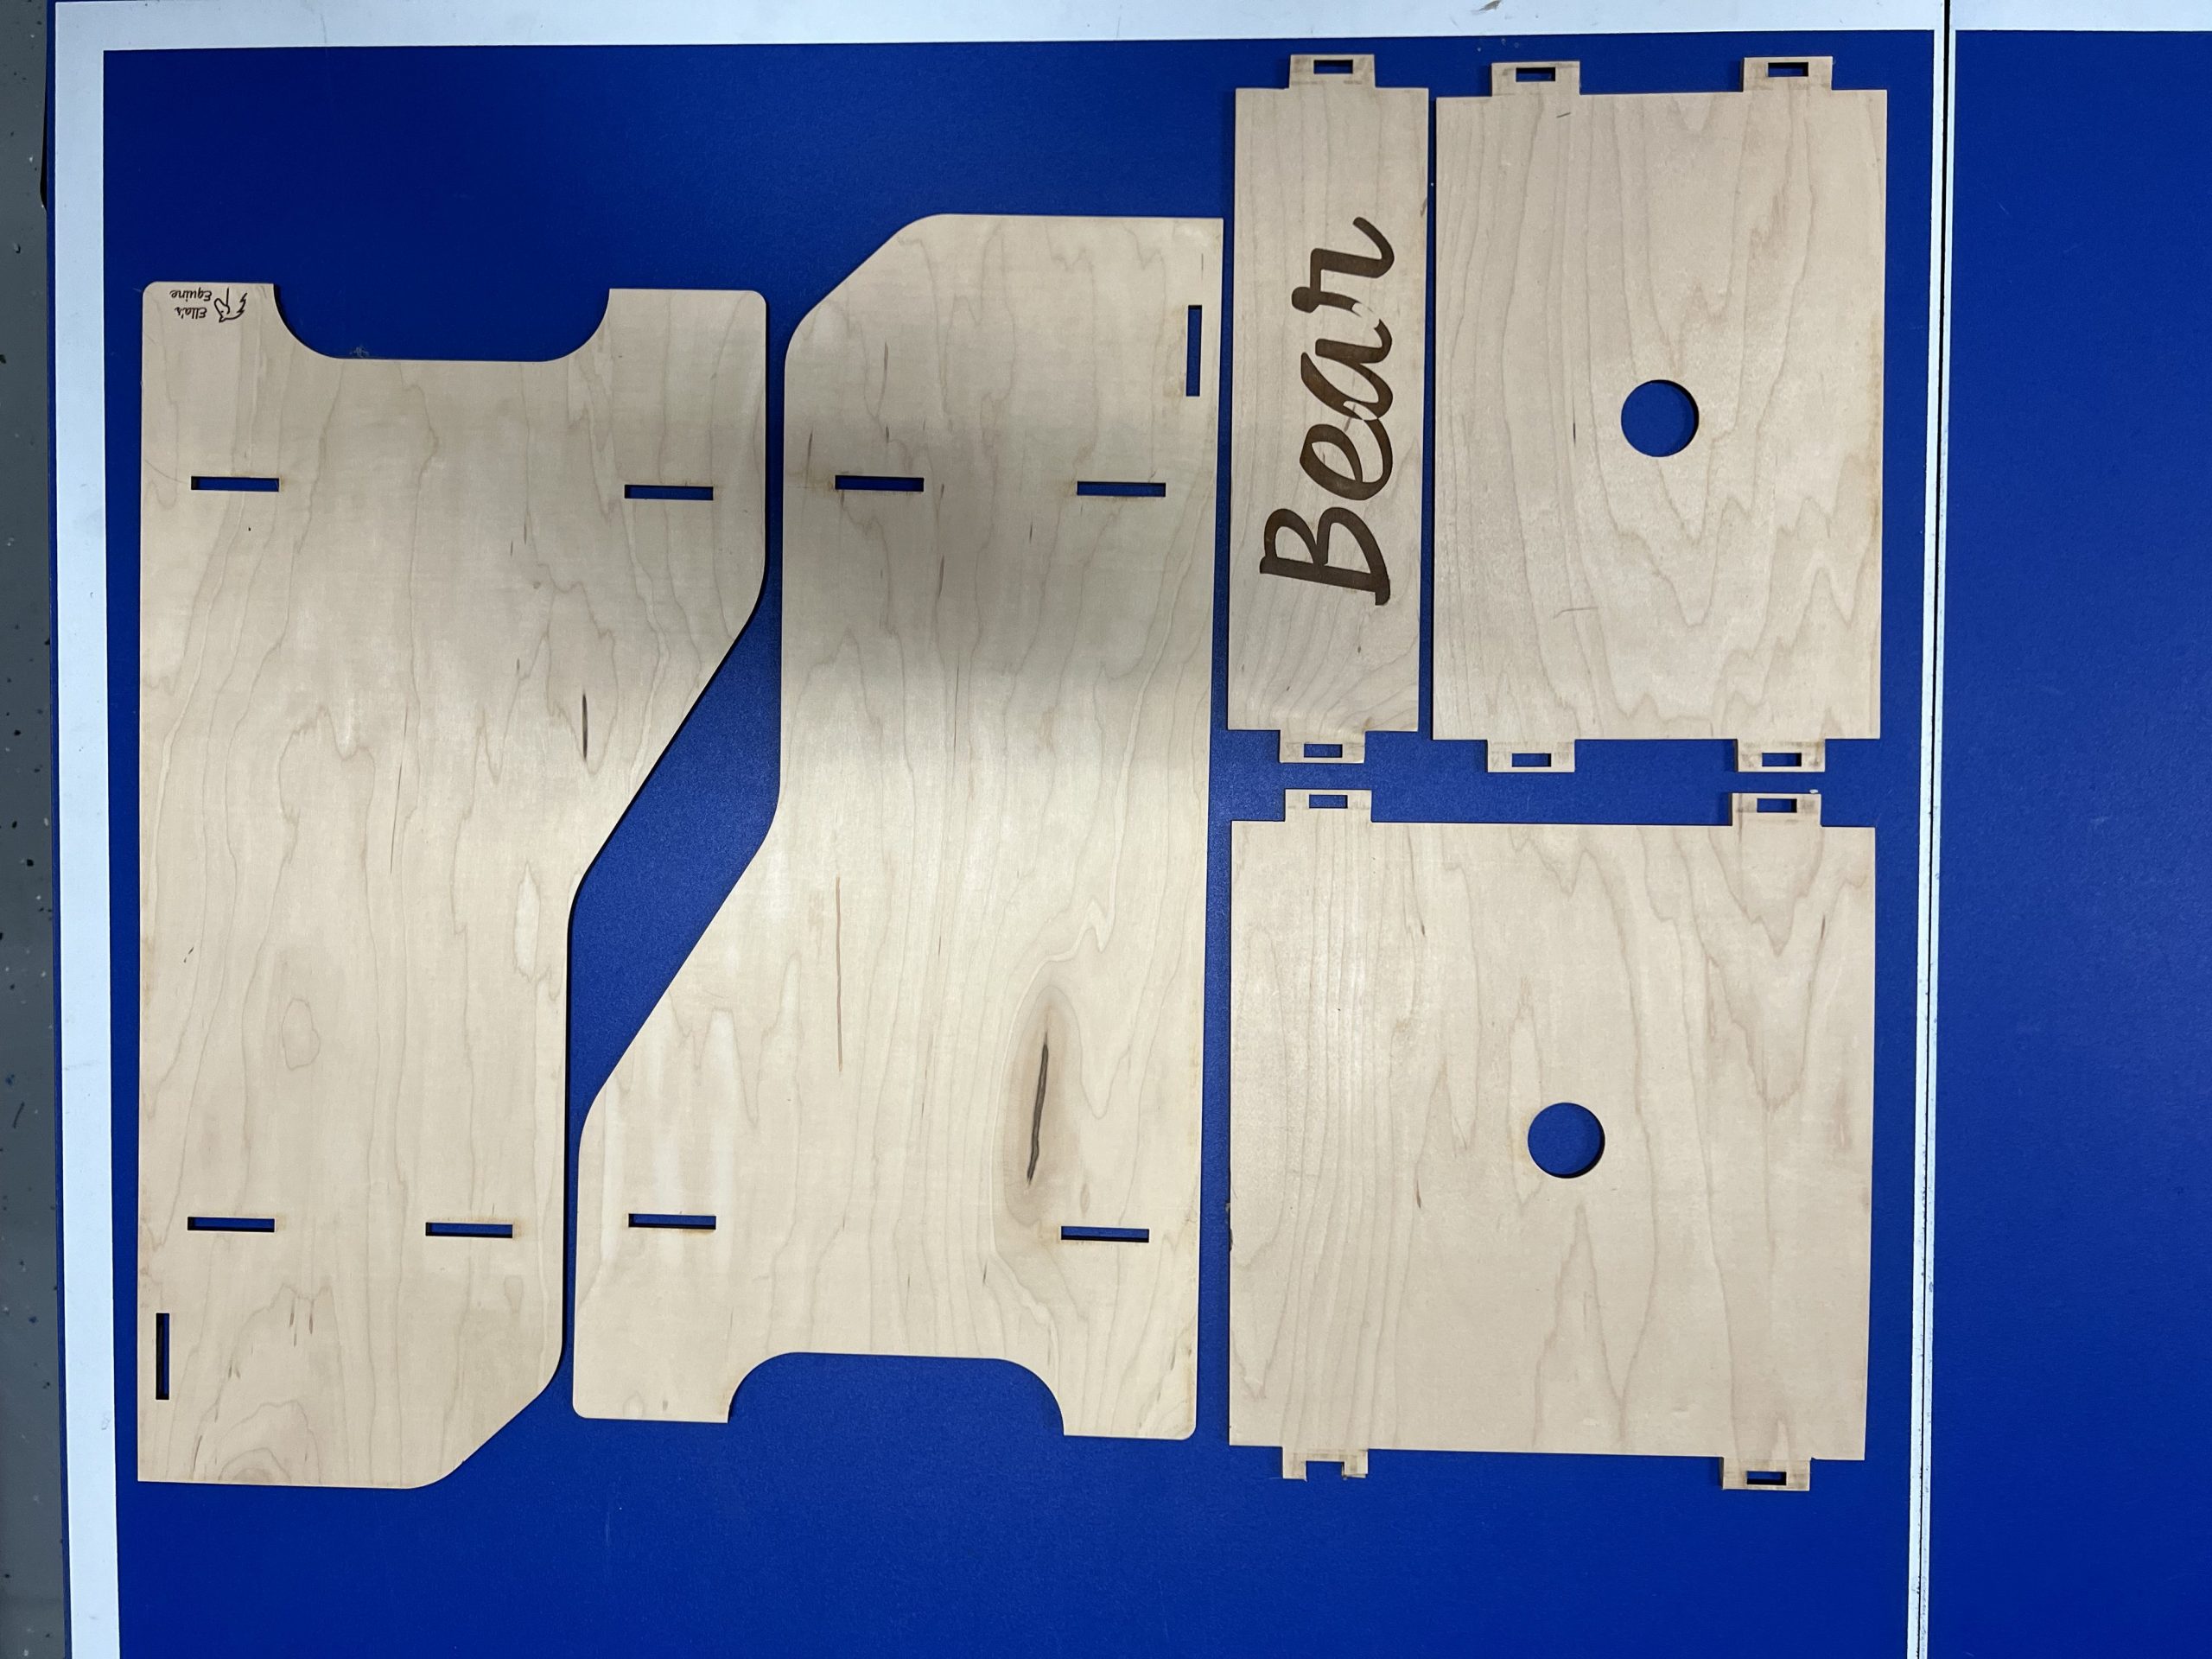
A couple years ago, hobby horses were the rage with the kids and after making a couple, Ella wanted a “holder”, so we laser cut this little horse holder from some plywood.
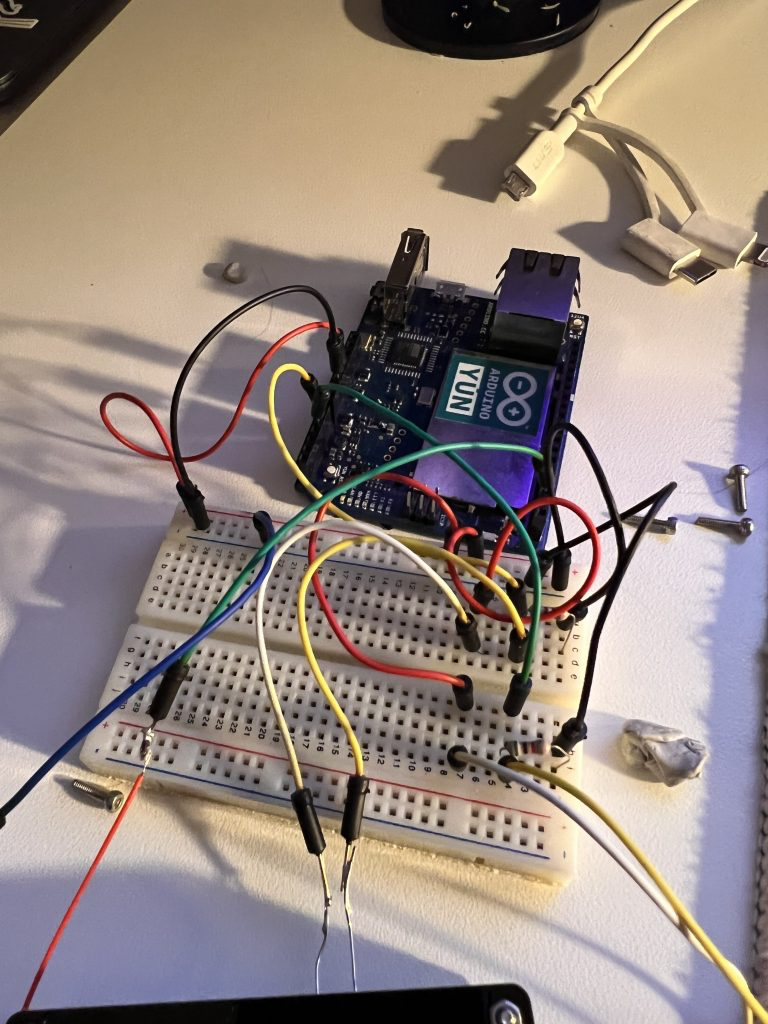
One of the benefits of Quantum Computing is their ability to generate truly random numbers.
Since classical computers are deterministic machines, governed by algorithms, they are inherently predictable. Therefor any number generated by a classical computer, even if it seems complex is actually based on a set of conditions or algorithm, which therefor makes it a “pseudo random number”, rather than truly random.
To generate truly random numbers you need to rely on a physical processor or phenomena that are unpredictable, examples of this include radioactive decay, electronic noise or even atmospheric noise.
Since QC is essentially based on a physical process and the probabilistic nature of quantum mechanics, its qubits can exist in a superposition state, this means they can represent a combination of 0 and 1 simultaneously, this state/property can be harnessed by QRNG (Quantum random number generators) to produce truly random numbers.
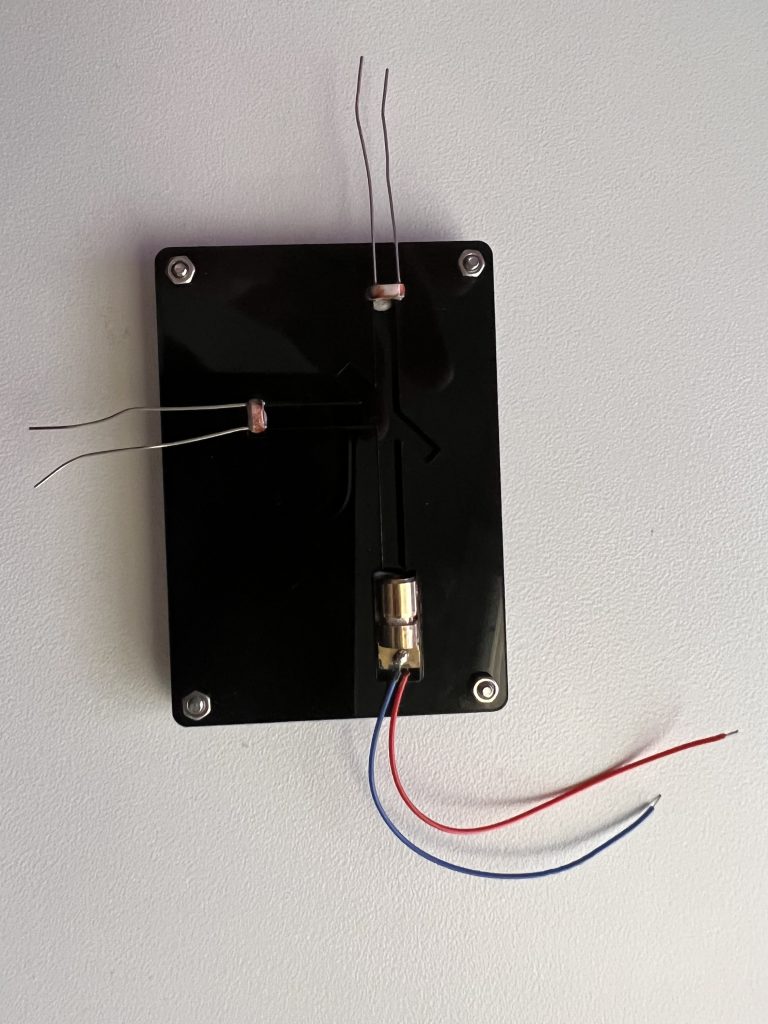
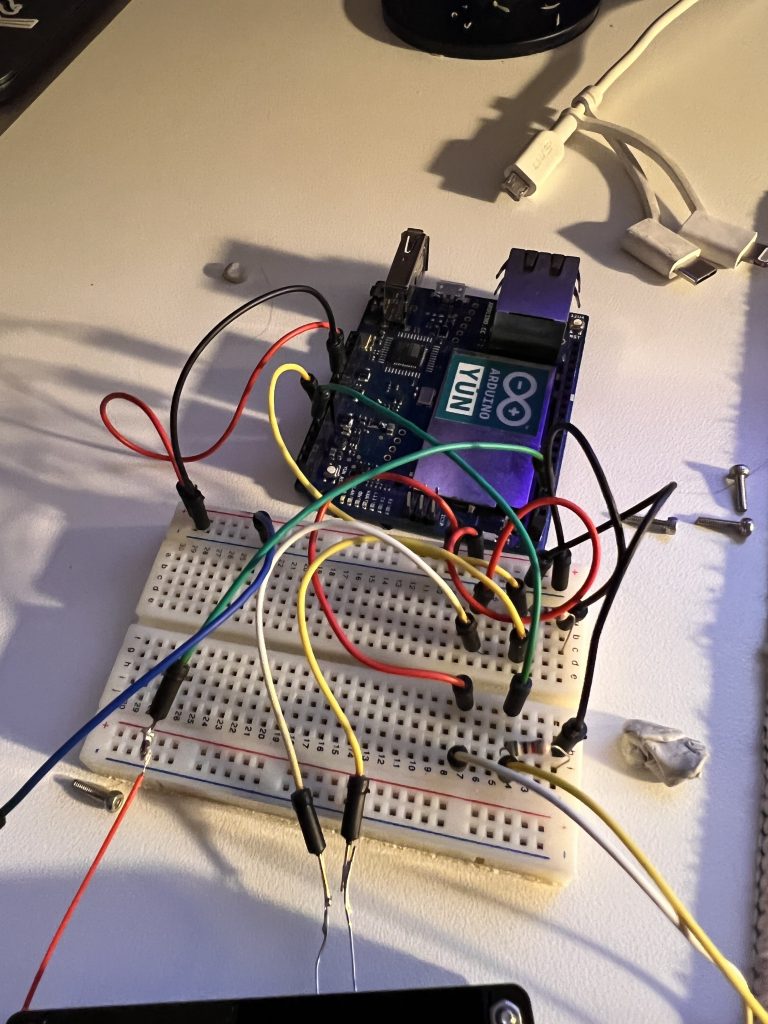
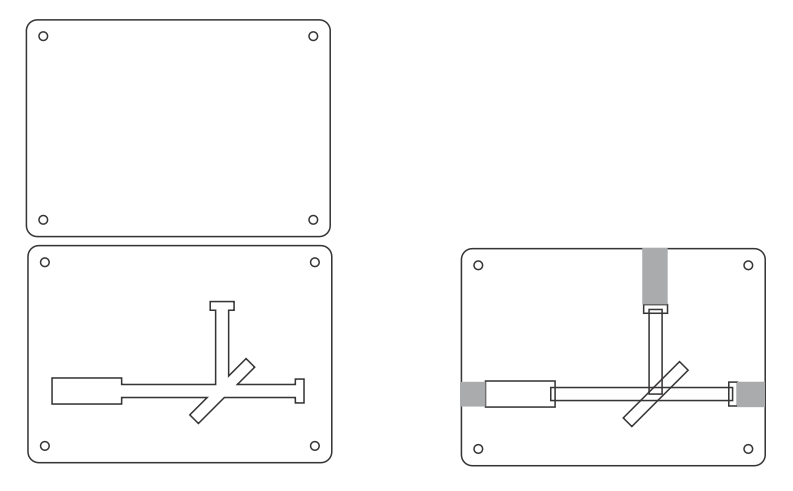
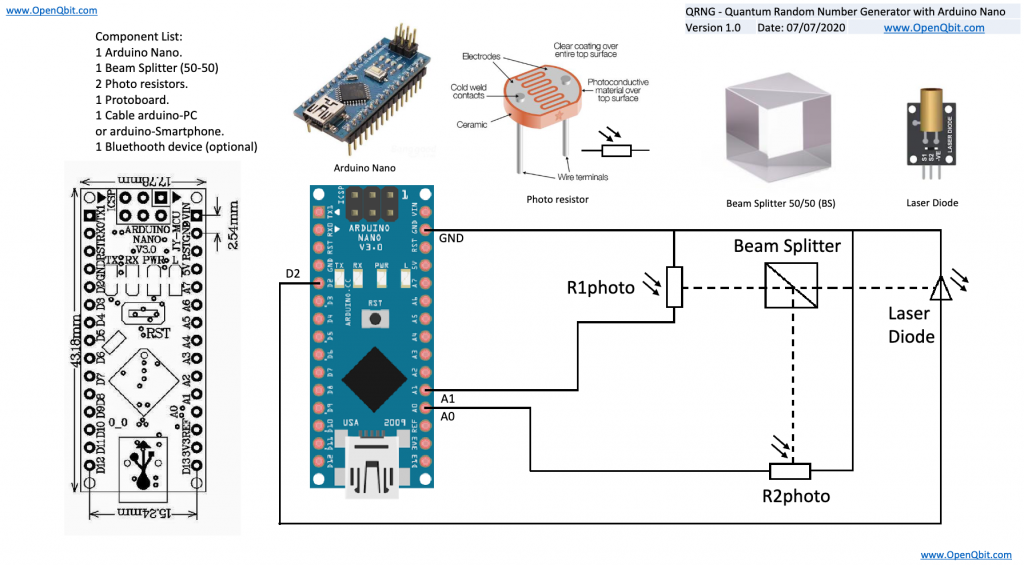
As a fun project, I decided to build a small physical QRNG using an Arduino, laser diode, beam splitter and two photo resistors. The basic premise is that you pulse the laser, it sends a wave/particle (both!) through the beam splitter, 50% of the time it should hit one of the two photo resistors, providing you with a random string of “1”s or “0”s.
While a very simple, basic and small example, it is a fun experiment. Check out OpenQbit.com if you would like to build your own. To make this a little easier, I laser cut a template/outline for the beam splitter for holding each of the components.
/*      Annotated QRNGv1 Firmware V1.1
   Author: Noah G. Wood
   Modified: Paul Aschmann
   Copyright (c) 2019 Spooky Manufacturing, LLC
   License: GPLv3.0

*/
int triggerPin = 2; // This pin will pulse our quantum circuit
int hPin = A0; // This pin measures the horizontal polarized photons
int vPin = A1; // This pin measures the vertically polarized photons
float H = 0;
float V = 0;
long previousMillis = 0;
long interval = 1000;
float maxH = 0;
float maxV = 0;

void setup() {
  // Just setting up triggerPin and serial connection
  //pinMode(13, OUTPUT);
  pinMode(triggerPin, OUTPUT);
  Serial.begin(9600);
}

int Random() {
  // Pulse the laser
  digitalWrite(triggerPin, HIGH);
  //delay(1);
  digitalWrite(triggerPin, LOW);
}

void loop() {
  // The main program
  // Run our program and print the random bit to serial
  //delay(1000);

  unsigned long currentMillis = millis();

  if (currentMillis - previousMillis > interval) {
    previousMillis = currentMillis;
    Random();
  }

  // Read the photoresistors
  H = analogRead(hPin);
  V = analogRead(vPin);
  // Determine random bit
  if (H > V) { // More photons in the H mode, return 0
    Serial.println("-------------------- >  H: ");
    Serial.println(H);
    Serial.println("V: ");
    Serial.println(V);
    if (H > maxH) {
      maxH = H;
      Serial.println("New max H");
    }
  } else if (V > H) { // More photons in the V mode, return 1
    Serial.println("-------------------- > V: ");
    Serial.println(V);
    Serial.println("H: ");
    Serial.println(H);
    if (V > maxV) {
      maxV = V;
      Serial.println("New max V");
    }
  } else {
    Serial.println("Same values");
  }
  delay(1000);
}
read more


You must be logged in to post a comment.